Proper RV battery winter storage is just as critical as winterizing your water lines when camping season winds down across Northern Ontario. When left connected or unmaintained during months of sub-zero temperatures, batteries can freeze, suffer irreversible cell damage, or lose capacity.
Follow this step-by-step guide to protect your electrical system and ensure your batteries are ready to roll next spring.
Step 1: Identify Your Battery Chemistry
Before grabbing tools, check which battery type powers your RV. Each chemistry demands distinct care, maintenance, and charging protocols:
- Flooded Lead-Acid:
- Contains liquid sulfuric acid electrolyte surrounding lead plates.
- Off-gases hydrogen during charging; must stay upright in well-ventilated areas.
- Higher natural self-discharge rate in storage; requires regular voltage checks.
- Requires periodic fluid checks and replenishment with distilled water.
- Sealed AGM (Absorbent Glass Mat):
- Lead-acid chemistry suspended in fiberglass mats.
- Sealed, valve-regulated, and spill-proof (can sit upright or on its side).
- Never needs water; holds charge longer than flooded models.
- Requires careful voltage control; never run an equalization charge cycle on AGM units.
- Lithium Iron Phosphate (LiFePO4):
- Advanced cells managed by an internal Battery Management System (BMS).
- Zero fluid maintenance; exceptionally low self-discharge rate.
- Can be stored fully charged when completely disconnected.
- Temperature Warning: Never charge lithium cells below freezing (under 0°C / 25°F to 32°F) unless they include built-in internal heating elements.
Step 2: Inspection and Cleaning for RV Battery Winter Storage
Road grime, dust, and temperature swings take a toll over the camping season. Clean the battery before removing it from its tray:
- Perform a visual casing inspection: Check for cracks, leaks, or bulging sidewalls. A bulging or fractured battery case indicates internal degradation; do not charge, store, or reuse it.
- Check for terminal corrosion: Look for white, green, or blue powdery buildup around posts and lugs, which adds electrical resistance and blocks charging.
- Mix a neutralizing solution: Combine household baking soda (sodium bicarbonate) with clean water (use roughly 1 cup per gallon of water, or a 1:5 baking soda-to-water ratio).
- Tighten vent caps: If servicing flooded batteries, ensure all cell caps are fully tightened. Baking soda must never enter flooded cells, as alkaline solutions neutralize acidic electrolyte and destroy the battery.
- Scrub and rinse: Apply the mixture using a stiff nylon or wire terminal brush until the bubbling corrosion stops. Rinse thoroughly with clean water and dry completely with clean rags.
- Check fluid levels (flooded cells only): If internal lead plates are exposed to air, add just enough distilled water to submerge them prior to charging. Never use tap or mineral water. The final top-off to the fill well should wait until the battery is fully charged to allow for normal expansion.
Step 3: Safely Disconnect Cables for RV Battery Winter Storage
Following the correct disconnection sequence prevents short circuits and protects your RV’s 12V electrical components. (For broader RV winterization tips, see 7 Simple Steps To Winterize Your RV.)
- Power down all circuits:
- Turn off all 12V interior appliances and 12V breakers.
- Unplug the RV from shore power.
- Switch off the master battery disconnect switch.
- Suit up safely:
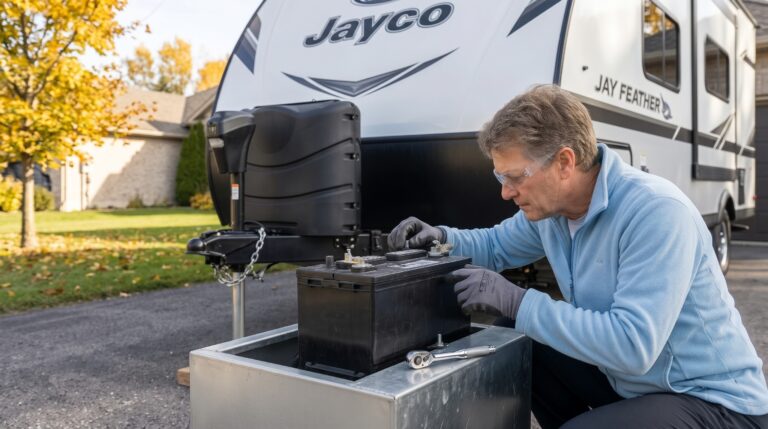
- Put on safety glasses and chemical-resistant protective gloves.
- Remove all rings, metal watches, and jewelry. A metal ring bridging across battery terminals can cause severe, instantaneous arc burns and injury.
- Disconnect the negative terminal first:
- Loosen and detach the negative (-) ground cable (typically black) first, tucking it away from the post.
- Why this sequence matters: Removing the ground cable cuts the return path to the RV frame. If your wrench accidentally bumps the chassis while loosening the positive terminal afterward, no closed circuit or short occurs. Loosening the positive terminal while grounded risks severe sparks, arc burns, tool damage, or igniting hydrogen gas.
- Disconnect the positive terminal second:
- Loosen and remove the positive (+) red cable.
- Label secondary wires and take a photo:
- Modern RVs often have multiple auxiliary wires hooked directly to posts (e.g., solar charge leads, breakaway switches, power tongue jacks).
- Tag them with colored electrical tape or labels and snap a quick photo to make spring reinstallation effortless.
- Lift the battery from the tray: Keep flooded models level to prevent acid spills.
Step 4: Choose the Right RV Battery Winter Storage Location
- The Ideal Spot: Choose a cool, dry, well-ventilated indoor space shielded from weather, such as a basement, climate-controlled utility room, or insulated garage.
- Keep Temperatures Moderate:
- Lead-acid: A fully charged battery’s electrolyte has a high acid concentration, dropping its freezing point to well below -50°C. If allowed to discharge, the electrolyte reverts largely to water, freezing near 0°C, cracking the plastic case, and destroying the plates.
- Lithium: Tolerates storage temperatures from -26°C to 60°C (-15°F to 140°F), with optimal conditions between 0°C and 35°C (32°F to 95°F).
- Elevate on a Bench or Shelf: Modern polypropylene and polycarbonate cases prevent electrical leakage into concrete floors, debunking the old myth that concrete discharges modern batteries. However, placing batteries on a wooden shelf or sturdy workbench keeps them away from damp floors, standing meltwater, and debris buildup.
Step 5: Manage Winter Charge Levels
Allowing batteries to sit unmonitored across winter invites plate sulfation and cell death. Match maintenance to your battery type:
For Flooded and AGM Lead-Acid Batteries
- Use an automatic multi-stage smart maintainer: Avoid basic trickle chargers, which supply uninterrupted current that boils flooded electrolyte or dries out AGM units. A smart maintainer evaluates voltage and cycles between bulk, absorption, and a gentle float stage (typically 13.2V to 13.5V) while compensating for ambient temperatures.
- Manual monitoring alternative:
- Disconnect the maintainer and use a digital multimeter every 4 to 6 weeks (flooded) or 2 to 3 months (AGM).
- Apply a boost charge whenever open-circuit voltage drops toward a 70% state of charge (~12.37V, per Trojan Battery). Dropping below 60% to 70% in sub-zero cold risks plate sulfation and freeze damage.
For Lithium (LiFePO4) Batteries
- Quality lithium units lose only 2% to 3% capacity per month and do not require float chargers.
- As recommended by lithium manufacturer Battle Born Batteries, optimal RV battery winter storage means fully charging the pack, turning off the master switch, and completely disconnecting all terminal leads to prevent parasitic drain.
- Store the disconnected battery untouched for the season, checking open-circuit voltage periodically.
Step 6: Spring Testing and Reinstallation
When camping season approaches, prepare your battery bank for service. (For comprehensive reopening steps, view The Ultimate Spring RV De-Winterization Checklist.)
- Rest the battery before voltage checks: If recently charged, let the battery rest disconnected from all loads and chargers for 6 to 24 hours to dissipate surface charge.
- Confirm open-circuit voltage with a multimeter:
- Healthy Flooded Lead-Acid: 12.60V to 12.73V
- Healthy AGM: 12.80V to 13.00V
- Healthy Lithium (LiFePO4): 13.30V to 13.60V (Note: A reading below 10V indicates the internal BMS has entered low-voltage protection mode and requires specific wake-up reactivation).
- Final inspection: Check casing for winter cracks and ensure flooded electrolyte covers the plates (topping off to the fill well with distilled water).
- Mount securely: Position the battery in the RV tray and tighten hold-down brackets firmly to prevent shifting during travel.
- Reconnect in reverse order:
- Connect the positive (+) red cable first.
- Connect the negative (-) black ground cable last.
- Protect connections: Tighten all terminal hardware and coat terminals with a thin layer of petroleum jelly or anti-corrosion spray to prevent oxidation.
Quick Winterization Checklist
Following these steps ensures your RV battery winter storage runs smoothly and protects your investment from freezing.
- Shut off all 12V appliances, breakers, and the RV master disconnect switch before touching terminals.
- Put on safety glasses and chemical-resistant gloves; remove all metal jewelry and watches.
- Label all battery wires and secondary leads with tape or photos.
- Disconnect the negative (-) ground cable first, then disconnect the positive (+) cable.
- Clean terminal posts and lugs with a water/baking soda solution and wire brush (ensure flooded cell caps are tight).
- Rinse terminals thoroughly with clean water and dry with clean rags.
- Inspect flooded cell fluid; top off exposed plates with distilled water before charging.
- Fully charge the battery before placing it into storage.
- Store disconnected batteries off the floor on a clean wooden shelf in a cool, dry, well-ventilated indoor space.
- Maintain charge using a smart maintainer, or test voltage every 4 to 6 weeks and boost charge lead-acid units when dropping near 70% (~12.4V).
- In spring: Check rested voltage with a multimeter, install, reconnect the positive (+) cable first, and reconnect the negative (-) cable last.
- Coat reinstalled terminals with petroleum jelly or anti-corrosion spray.
Have questions about battery health, smart maintainer compatibility, or winterizing your RV? Contact the service team at Christie’s RV for expert assistance.
Contributed by the Service Department at Christie’s RV
Reviewed and verified by our certified RV technicians in Sault Ste. Marie, Ontario.
With decades of combined experience preparing travel trailers and fifth wheels for severe Northern Ontario winters, the Christie’s RV service team handles seasonal winterization, electrical inspections, and preventative maintenance. Our certified technicians service hundreds of RV battery systems annually to help owners protect their investments and stay safe on the road.